06 Oct Scissor Cutting Tips
Children typically have started scissor cutting skills by age three snipping paper. Yet, many parents are often reluctant to start cutting due to safety concerns. Cutting can seem like such a simple task, but when I start to explain to parents all the elements involved, they start to look overwhelmed. Here are a couple things to consider to ease into teaching this important skill to your child.
Types of Scissors
There are many types of scissors available to children. The style with two different sized loops is preferred. You may want to consider using self-opening scissors for young children new to cutting. They are safer at the tips and require less coordination because they pop open after the child releases the squeeze. This is easier for children without strong hand muscles and can be used with either hand for those that haven’t established a dominant hand.
It is important to remember that left-handed children should use left-handed scissors. Typically, left-handed children will eventually teach themselves to use right-handed scissors, but the constant switching may lead to confusion for the child as well as the parent. Often a parent might encourage a child to be right-handed when they frequently switch hands. This is not suggested and can be avoided with the right tools.
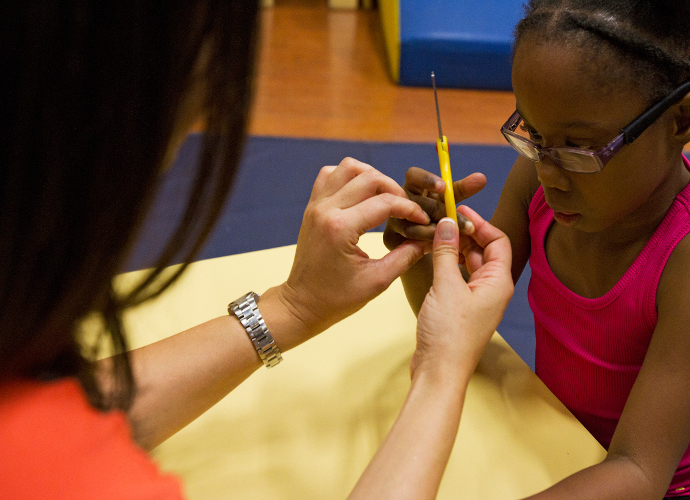
Scissor Grasp
When using scissors with loops of two different sizes, you want to keep the child’s index finger outside of the larger loop and the thumb inside the smaller one. The index finger helps to guide the scissors and keeps the palm of the hand separated into two parts. This is needed for more controlled coordination. For a visual demonstration, check out the Playapy YouTube video entitled, How to Hold Scissors.
Hand & Arm Positioning
When cutting, the elbows of both arms should be close to the body and the wrist should be positioned so that the thumb is facing the child not down toward the paper. This encourages the child to always cut up the paper. When the child elbows are positioned away from the body, the child is typically avoiding use of the small muscles in the hand. The non-dominant hand should also be positioned with the thumb facing up to encourage paper turning. If the child has difficulty keeping the elbows close to the body, try placing a piece of paper or a thin book in the space to make them more aware of it by squeezing in to hold it in place momentarily.
Cutting Progression
When working with beginners, start by cutting across a piece of paper and then on straight lines. Then move on to three-inch circles and move onto angled shapes when the rounded shapes are fairly mastered. Eventually, you can decrease the size of the shapes, make them more complex, or make the paper thicker to increase strength.
Action Words
Lastly, saying words while the child is closing down on the scissors can help to regulate the speed or encourage the child to use more strength. For example, try saying, “CHOMP” repeatedly and pretending the scissors are a hungry alligator.
You can also motivate your child to cut using their favorite cartoon characters or animals. Be sure to check out the Playapy Shop to purchase the 5 Baby Dinosaurs Set if your child loves dinosaurs. The digital playsheets are great for coloring and cutting opportunities.
I hope you find these tips helpful. Have a playful day!
Amy Baez, MOT, OTR/L
Amy Baez is the Founder of Playapy and Creator of the PALS Handwriting Program. She is a pediatric occupational therapist, speaker, and parent coach with 20 years of experience. Learn more at www.amybaez.com.